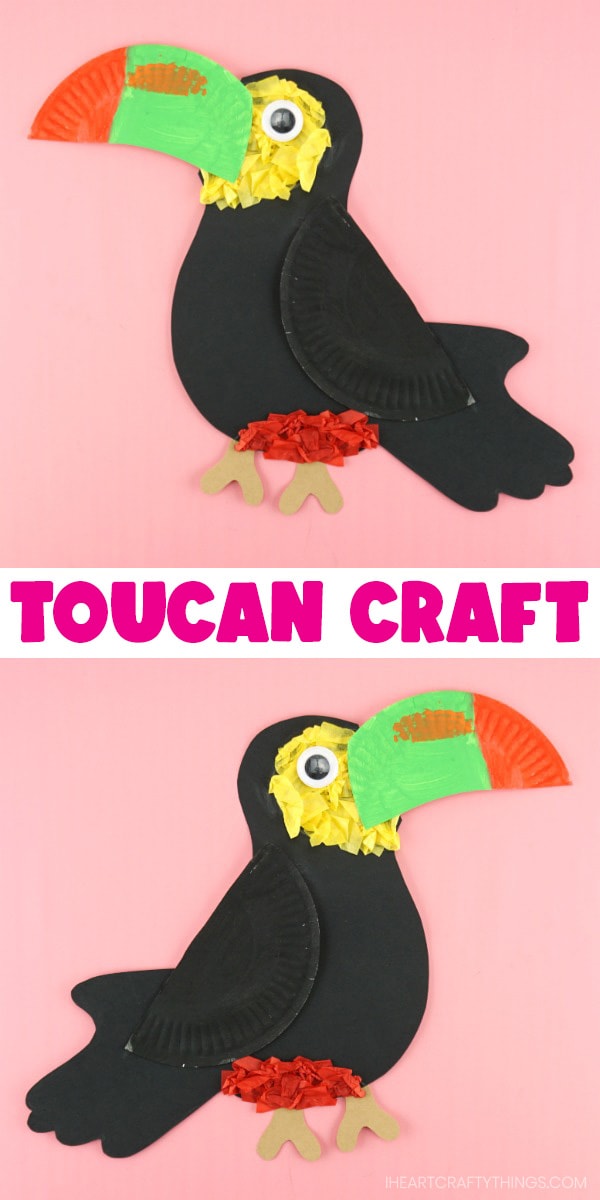
Are you sick of paper plates yet?? I can’t seem to create something without using them lately. The inspiration for this fun toucan craft came from internet . They used a paper plate for a beak and it was an instant winner for me!
My family recently took a trip to our local bird aviary. My son was delighted to see a Toucan and told me it was his most favorite bird he saw while at the aviary. That definitely warrants a craft don’t you think?

Supplies needed:
- Toucan Pattern Template <—– Get the Template Here
- 2 sheets Black and quarter sheet of brown Cardstock Paper
- small paper plate
- red and yellow tissue paper
- red, green, black and orange paint (or whatever colors you want to paint the beak)
- paintbrushes
- large googly eye
- glue stick
- white crayon
- scissors
Tutorial:
1. Make the beak
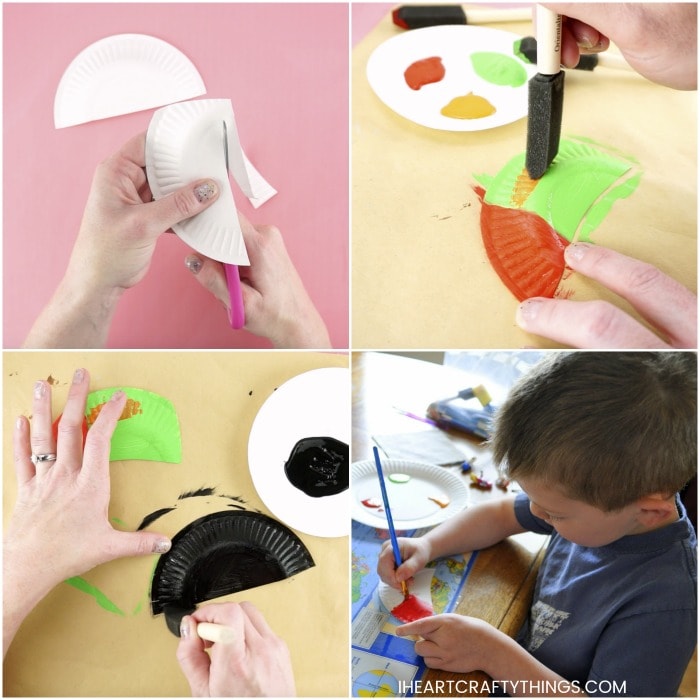
Cut your small paper plate in half. Cut the end of one of the half’s off and give it a little bit of a curved shape at the bottom to form the beak. Here’s a close-up of the beak pictured below so you see what I mean.
2. Color your wing & beak
Paint the full half section of the paper plate black. This section will be used for the wings of the Toucan. Paint the beak section with the colors of your choice. My son used red, light green and orange in his beak. Let the pieces dry completely.
3. Cut out body parts
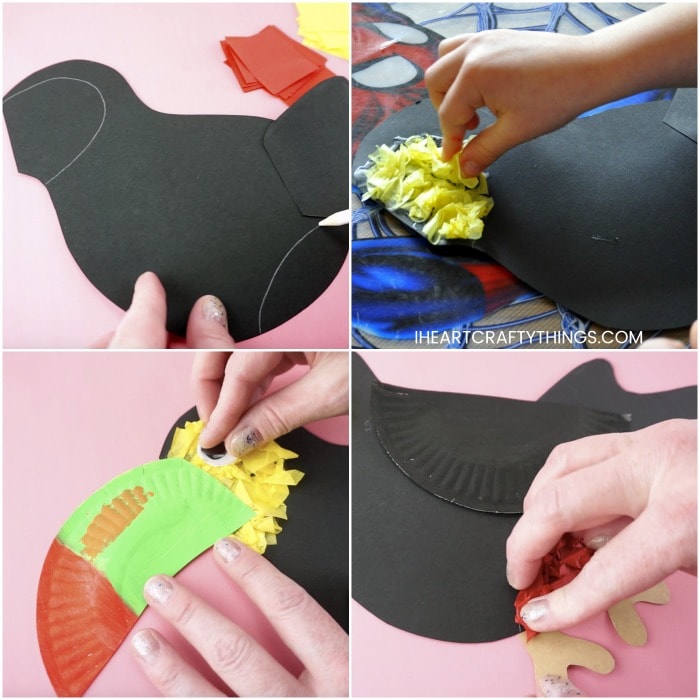
Next cut out your Toucan body and feet. I have made my template available for you on Google Drive: Toucan Template. I traced the body template onto a black piece of cardstock paper for my son to cut out and I cut out the two feet on brown cardstock paper.
4. Make a feathers
For the tail feathers, trace your child’s closed hand on a piece of black cardstock paper and cut it out, then have your child glue it onto his Toucan body.
5. Glue tissue paper to the Toucan
To replicate the yellow and red feathers on the Toucan face and underbelly, I outlined the areas with white crayon, then my son glued yellow and red crumpled tissue paper in those areas.
6. Glue all parts to the bird
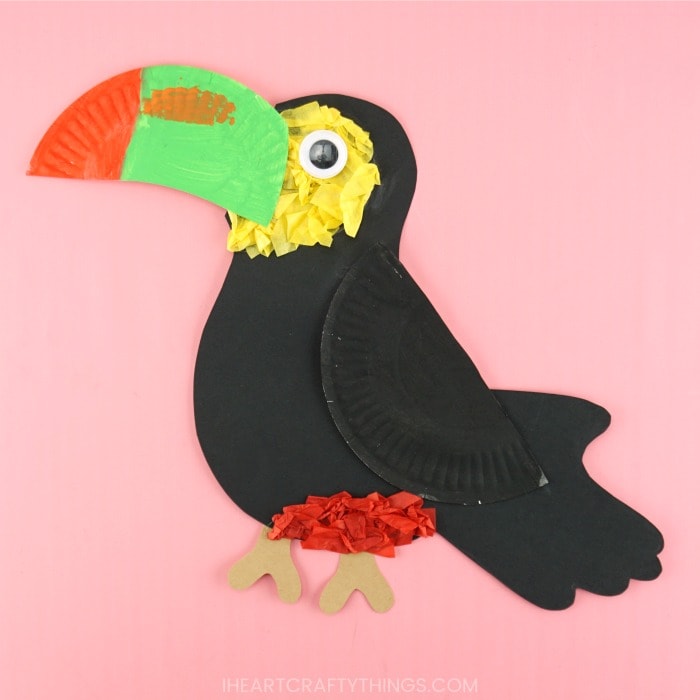
To finish the Toucan, glue on the feet, a large wiggly eye, the black wing and the colorful beak.