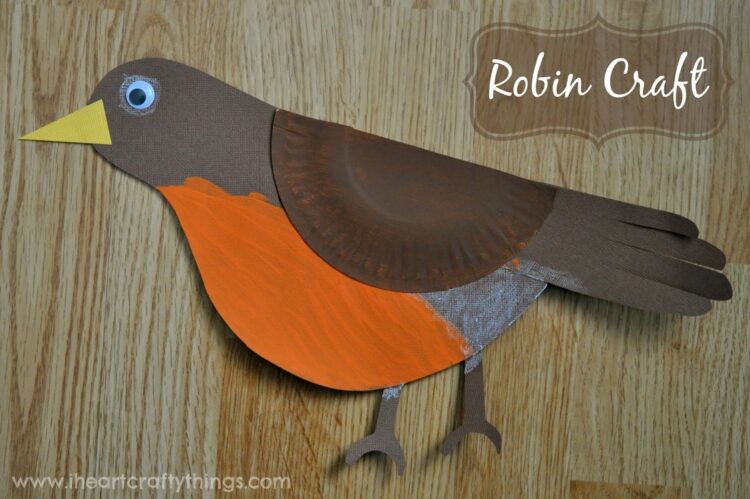
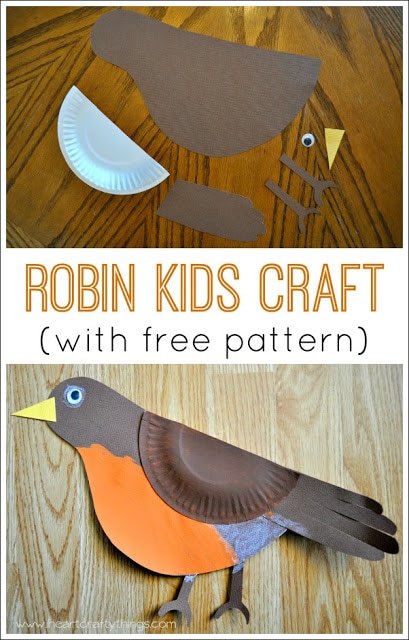
Robin Bird Craft

One of my favorite things about spring time is all the beautiful robin birds that live around and frequent my yard. Every day we watch as they fly down, walk around and mingle, or hang out on the fence posts. They are such beautiful creatures! My daughter loves them as well so I was excited to put together a Robin Craft for her.

{This post contains affiliate links for your convenience. Read our Disclosure Policy for more information.}


Check out this great book all about Robins. I happened to grab it at a local thrift store a couple years ago for 25 cents and my kids have loved it every year during spring.


A Nest Full of Eggs by Priscilla Belz Jenkins and illustrated by Lizzy Rockwell


It follows a full year of growth of robins from how they develop in the egg in spring, how they mature from chicks into fledglings in the summer, how they learn to fly in the fall, and how they leave for warmer climates in winter–only to return when spring comes around again. It’s a fun educational book that hits close to home since we see the birds every day in spring.


One year we actually had the privilege of having a baby robin live in our backyard that had fallen out of it’s nest. We didn’t bother it because we didn’t want to interfere, but just watched for a couple weeks as Momma bird came and took care of her baby by bringing it worms and food. We watched it get stronger by the day and learn to hop around the yard until it was able to fly away. It was incredible!


HOW TO MAKE A ROBIN BIRD CRAFT


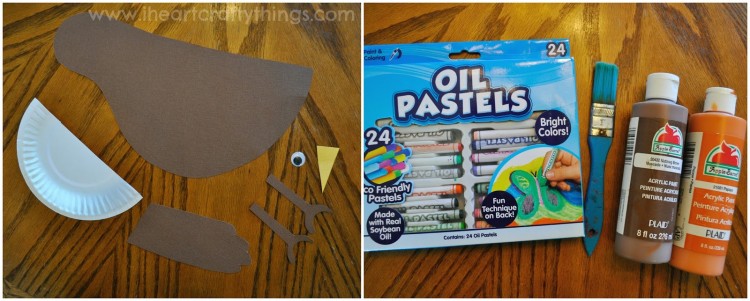
Supplies you will need:

  • Robin Body Pattern printed out that I have provided for you
  • 2 sheets Brown Cardstock Paper
  • 1 small dessert size paper plate cut in half
  • medium size wiggly eye (We received ours from Craftprojectideas.com)
  • yellow beak cut out of cardstock paper
  • brown paint
  • orange paint
  • paint brush
  • white Oil Pastel or Crayon (we received ours from Craftprojectideas.com)
  • scissors
  • glue


Directions:

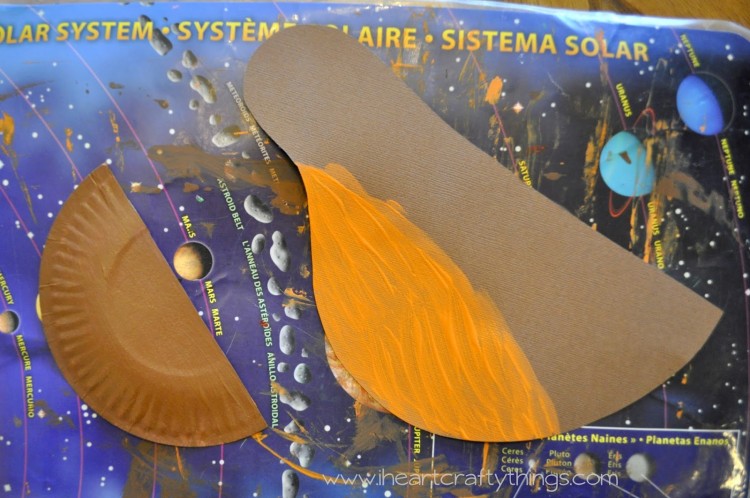
1. Trace the Robin Body Pattern on a sheet of brown cardstock paper and cut it out. Paint the belly section of the Robin body with orange paint.


2. Paint the half of the small paper plate with brown paint. Let both pieces dry completely.


3. Trace your child’s hand on the second sheet of brown cardstock paper with fingers closed. Cut the hand out. You will not need the thumb part of the hand so cut it off of the paper hand print all the way down. This will be the tail feathers of the Robin. Cut slits where the four fingers would be to create four different feathers.


4. Cut out 2 feet from the brown cardstock paper as well.


5. Cut out a small triangle shaped beak out of yellow cardstock paper.


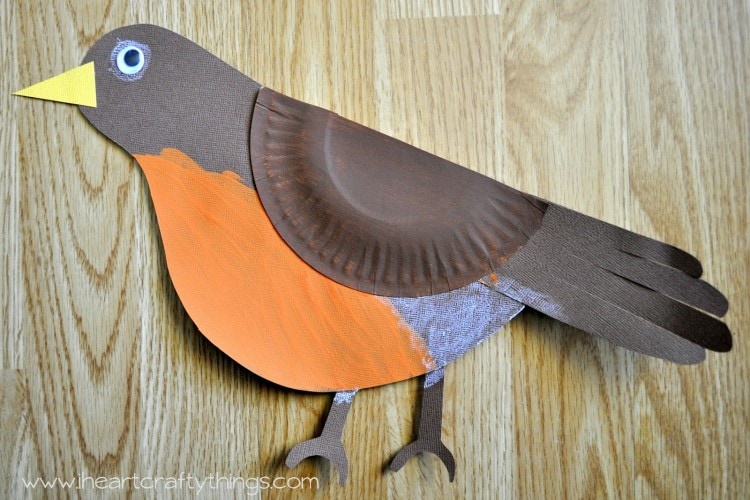
6. When the paint is dry, glue the tail feathers at the bottom of the bird body. Next glue the paper plate wing onto the body. Continue by gluing on the feet, beak and wiggly eye.


7. Use the white oil pastel to color white feathers under the wing, around the eye and in the neck area if you desire.


PIN ME PLEASE


Check out these other 11 Awesome Bird Crafts for Kids!


Follow I Heart Crafty Things on FacebookPinterest

Google+Twitter, and Instagram!


rachel

Family Pass Giveaway to Baby Animal Days at USU Botanical Center

Robin Eggs Math Game with Contact Paper