


{This post contains affiliate links, read our Disclosure Policy for more information.}
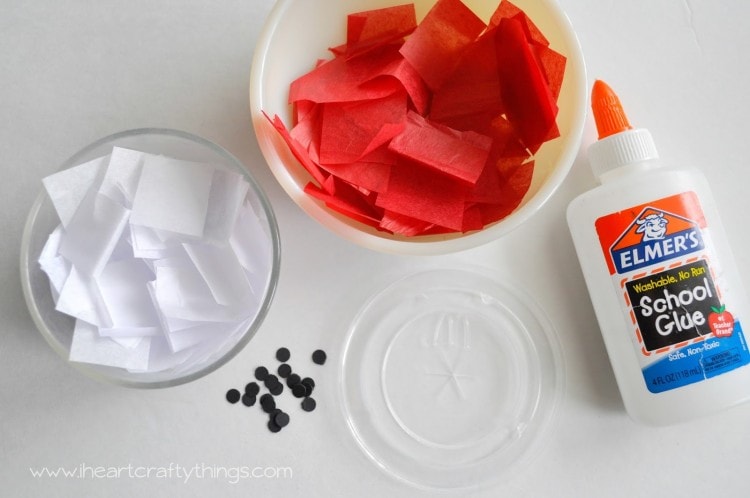
Supplies needed:
- Clear Plastic Drink Lid (I treated my kids to a McDonald’s smoothie to get our lids. If you have a large class, maybe they would be willing to donate some lids. Or ask parents to save lids from smoothies, Starbucks and coffee drinks that use these types of lids, etc.)
- School glue (make sure it says that it dries clear)
- red and white tissue paper squares
- hole punch
- black, green and brown cardstock
- scissors
Tutorial:
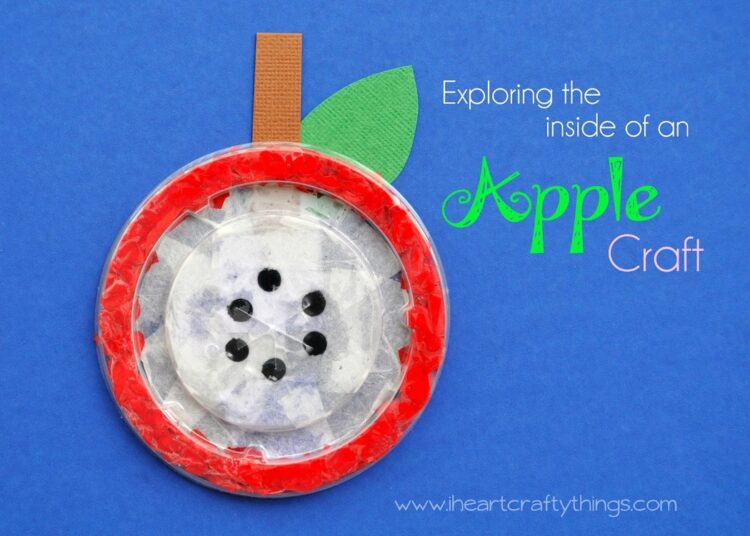
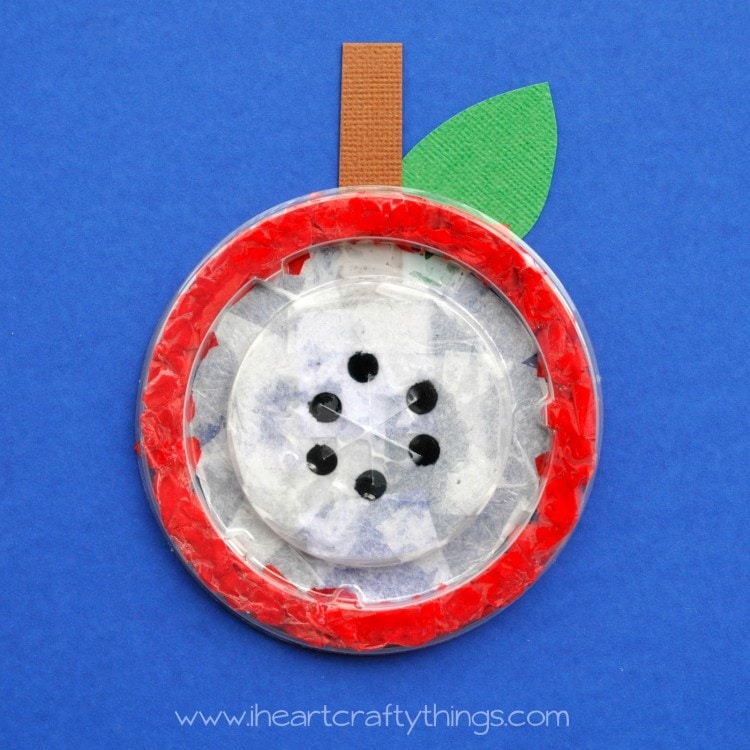
1. Glue black circles to the lid
Lay your drink lid on the table with the top laying down on the table. Use the X shapes from where you insert the straw as markings of where to add your apple seeds. Put a dot of school glue at the end of each straw line marking and add a black circle.
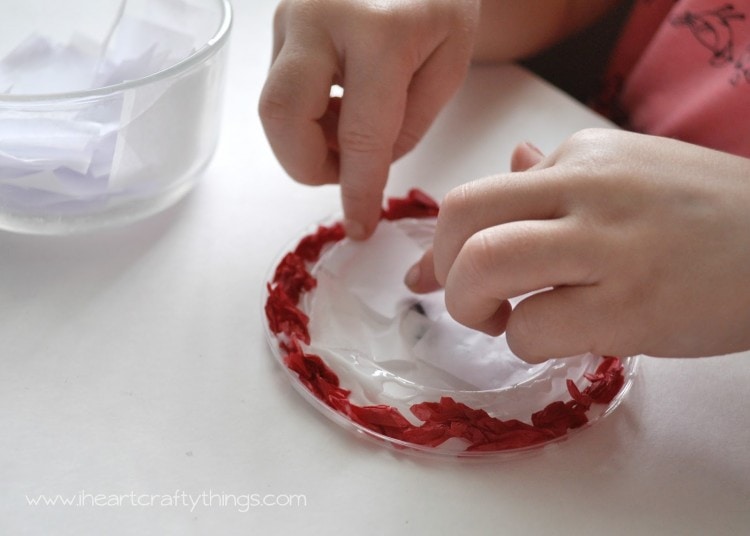
2. Glue red tissue paper around the rim
Next add school glue all the way around the outside rim circle of the plastic lid. Crinkle up red tissue paper squares and push them down into the rim of the cup. (I added glue all over my lid when I made mine as you can see pictured in the middle below, but I would recommend doing it in sections to make it easier for kids.)

3. Glue on white tissue paper
Add school glue to the remaining middle section of the lid and lay the white tissue paper squares all over the lid. Make sure to tuck the tissue paper around all the edges of the cup so it adheres to the glue and lid.
Pictured below (left) is what the back looks like after adding the white tissue paper. When you flip it over you will see that all of the white school glue shows through. Don’t worry! If you used the kind of glue that says “dries clear” it will dry clear.

4. Cut out & glue stem and leaf
Cut a small stem and leaf out of your brown and green paper and glue them to the back of your apple. Let it dry completely. It may require overnight drying depending on how saturated you put on the school glue.
When it’s all dry, flip it over and you are left with a window peek of the inside of an apple. Pretty neat huh?!!
You could also ditch creating the inside view of the apple and just use red tissue paper for the entire apple. Then hang them up on a window to create a stained glass effect with the plastic lid. Lots of fun possibilities!

