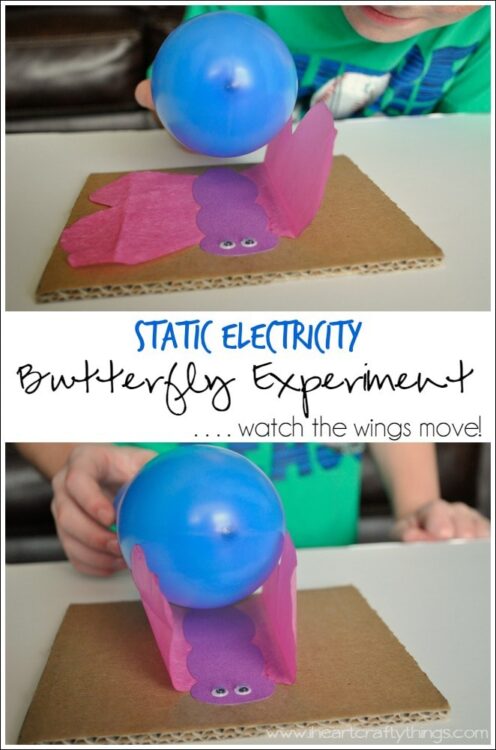
Static Electricity is a fascinating subject, especially for preschoolers. Every once in a while someone in my household will touch another family member after unintentionally rubbing their feet on the carpet and will give them an accidental shock. It stirs up all sorts of fun conversations about electricity. My Mom used to be a school teacher and I remember her using this fun static electricity experiment where children charged a balloon and could magically make butterfly wings flutter up and down. I decided to give it a go with my children and it was oodles of fun!
How does Static Electricity work?
Usually, an atom has an equal number of protons and electrons. Electrons have a negative charge of electricity and protons have a positive charge of electricity. Opposite charges attract, so when materials rub together and one material becomes negatively charged and one is positively charged, static electricity results.
Our Experiment:
To demonstrate the effects of static electricity. What will happen if we charge a balloon by rubbing it in our hair, and then hold it over tissue paper wings of a butterfly?
Supplies needed:
Tutorial:
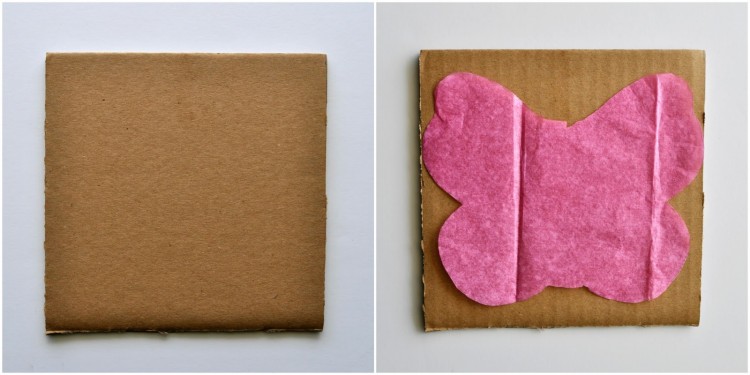
1. Cut out square shape
Start by cutting a square of cardboard. I made mine about 7 inches x 7 inches.
2. Draw and cut out butterfly wings
Use your pencil to draw butterfly wings on your tissue paper. Since my cardboard square was 7″ x 7″, I just made sure to make them smaller than my square. Cut them out and set them onto your cardboard. DO NOT glue them onto the cardboard!
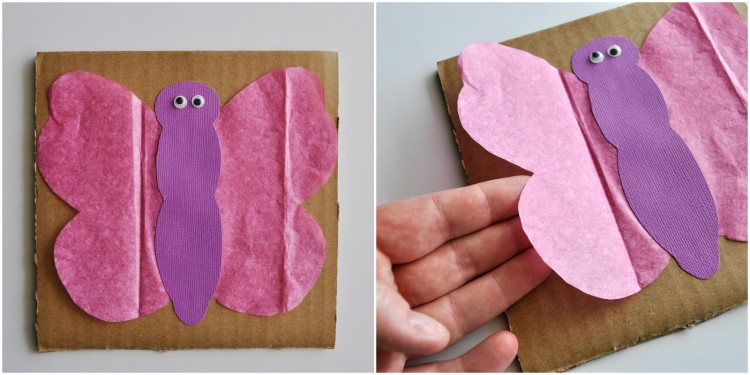
3. Cut butterfly body and add googly eyes
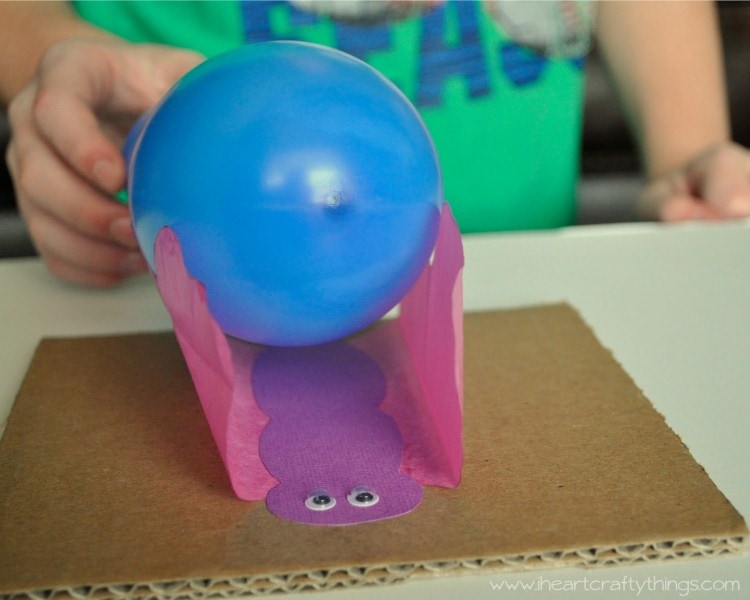
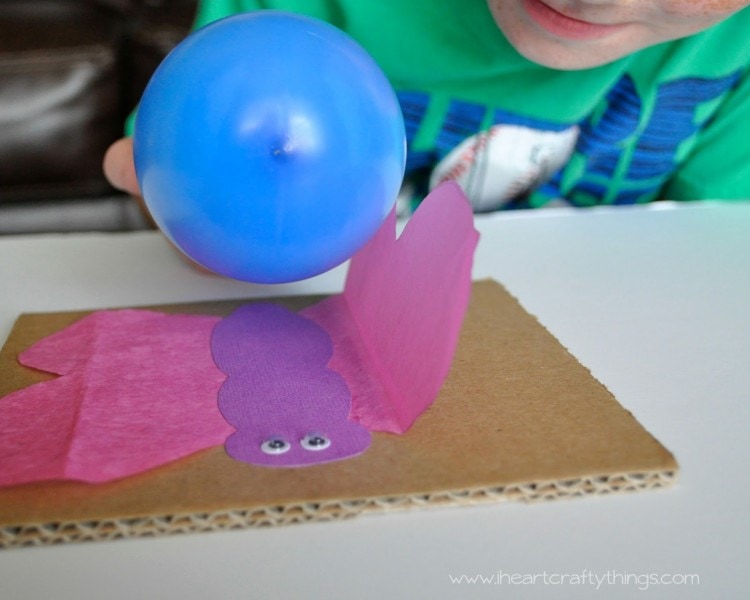
Cut a butterfly body out of your cardstock paper and glue it down the middle of your butterfly and overlapping it onto your cardboard. Again, DO NOT glue the tissue paper wings down. You will want the wings loose like shown in my picture below. Glue your googly eyes down onto your butterfly. I should have drawn antennae on our butterfly but I just didn’t think about it at the time. You can add those if you choose.
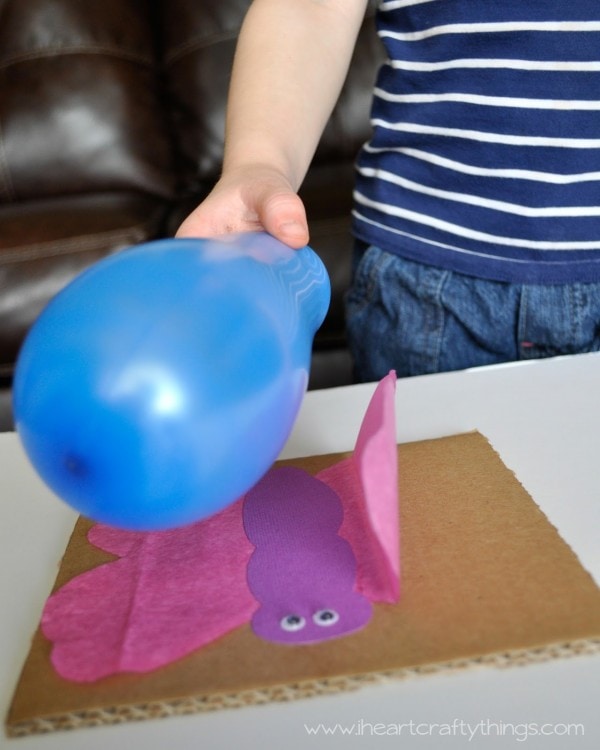
4. Blow up your balloon
Now comes the fun part. Blow up your balloon. We used water balloons that we had leftover from this summer so they were small in size, but using regular sized balloons would have been even better.
5. Rub balloon in your hair
Rub your balloon in your hair to give it an electric charge. Now hold the balloon on top of your butterfly, close but not touching it, and watch the wings raise and lower as you move the balloon closer and farther away.
My preschooler loved this! If the charge starts to fade, simply rub the balloon in your hair again and it’s ready to make your wings flutter all over again. It was a little difficult to get great pictures of the butterfly in action because my daughter moved so quickly.
Results: Why did the butterfly wings move?
When we rubbed the balloon onto our hair, electrons were lost from our hair and gained by the balloon giving it a static charge. When the negatively charged balloon gets close to the positively charged tissue paper they are attracted to each other, and the pull of attraction is so great that the lightweight tissue paper moves toward the balloon.
This experiment is obviously not limited to only preschoolers. My 9 year old son had a great time experimenting with the balloon and butterfly. He was a little more controlled in his movements so I was able to get a couple better pictures.