


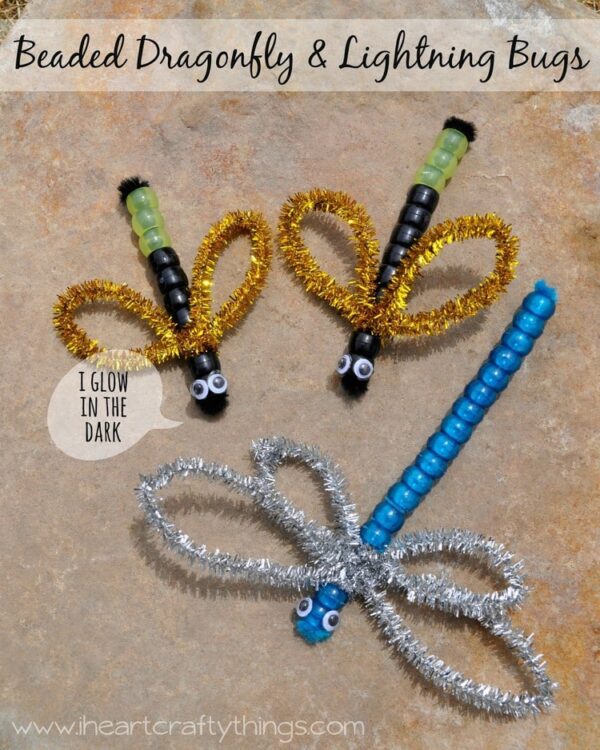
What you will need:
For the Dragonfly:
- Blue Translucent Pony Beads (approximately 15 beads)
- 2 Silver and 1 blue Glitter Sticks
- 2 tiny Wiggly Eyes
- 2 glue dots
- scissors
For the Lightning Bug:
- 1 Black and 1 Gold Glitter Stick
- Black Pony Beads (approximately 8 beads)
- Yellow Glow in the Dark Pony Beads (approximately 3)
- 2 tiny Wiggly Eyes
- 2 glue dots
- scissors
How to make Dragonfly:
1. Prepare fuzzy stick
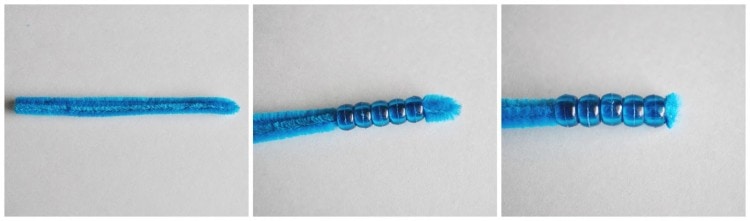
2. Start with the beads
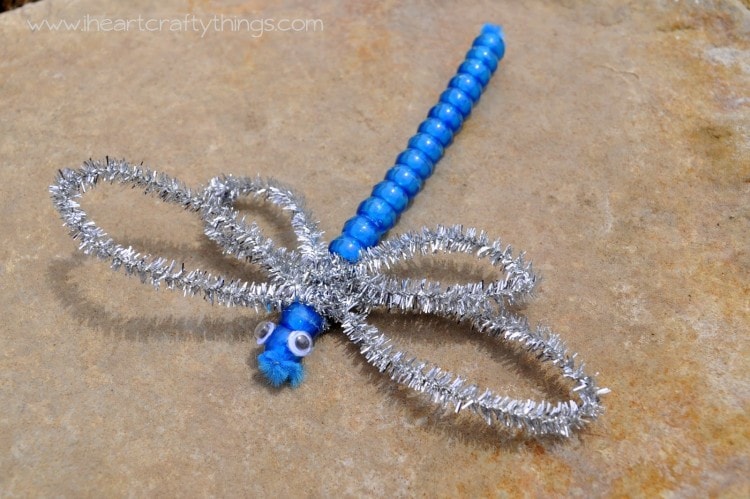
Begin to bead a couple of the blue pony beads onto the fuzzy stick close to the other end of the fuzzy stick. Twist the end a couple times and then fold it over the last bead to hold all the beads in place and to keep them from falling off.
3. Add beads till you reach the end
Continue adding beads to the fuzzy stick until you nearly reach the end. As you can see in the first picture below, I left a small space between my last two beads on the fuzzy stick. You will want to do the same so you have a space to add the wings on. After your last bead, twist the end of the fuzzy stick a couple times and fold it over the last bead to secure it in place.
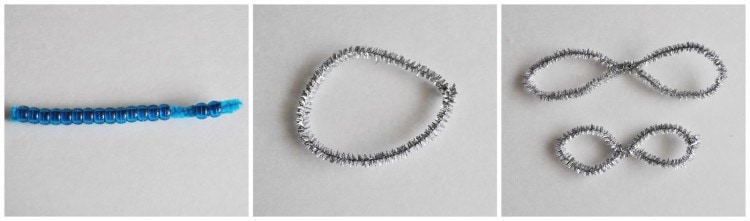
4. Make the big wing
To get the wings ready, take your first silver shimmer stick and fold it in half. Twist the ends together to join them in a circle and then pinch down the center of the circle to form oval shaped wings. Twist the shimmer stick once in the center for it to keep it’s wings shape.
5. Now – small wing
For the second pair of wings, cut about 2″ off of the shimmer stick and then complete step 4 again to make a smaller pair of wings.
6. Attach wings to the stick
Place the larger wing in the opening you left on the blue fuzzy stick. Twist the wings around the blue fuzzy stick once to secure it in place. Do the same with the smaller pair of wings underneath the large pair of wings.
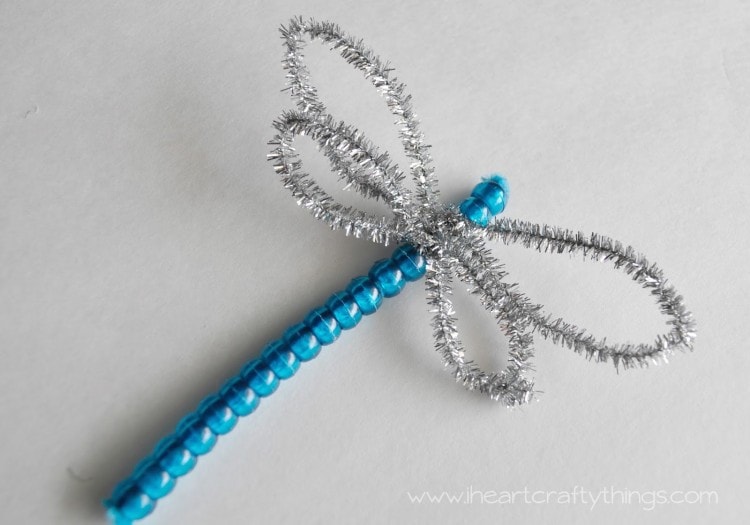
7. Finish with eyes
Finish your dragonfly by securing 2 tiny wiggly eyes onto the top pony bead with 2 glue dots. You could use a drop of hot glue if you don’t have glue dots.
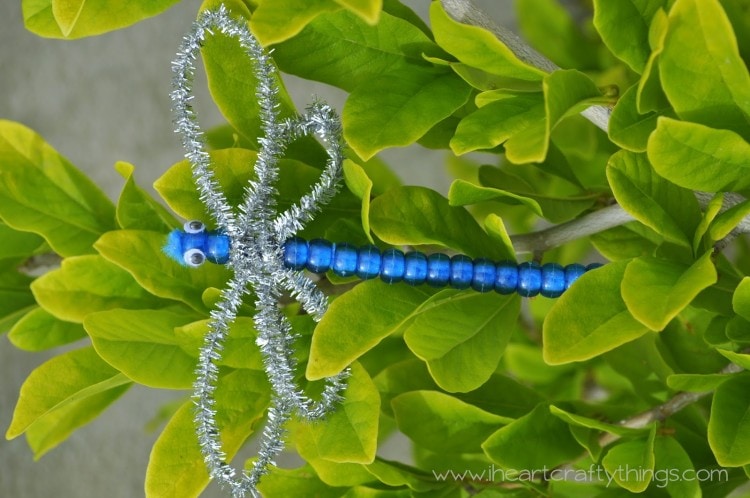
They look pretty stunning with the shimmery wings. My kids have had a lot fun playing hide-and-seek outside with their insects in the trees and bushes.
Tutorial for Lightning Bugs:
The Lightning Bugs were even more of a treat because we don’t have those were we live and we made them so their little ends do in fact actually glow in the dark!
The only difference in making the Lightning Bugs as opposed to the Dragonfly is that I made them smaller and they only have one wing, instead of the two.
1. Prepare fuzzy stick
2. Start with the beads
Begin to bead a couple of the blue pony beads onto the fuzzy stick close to the other end of the fuzzy stick. Twist the end a couple times and then fold it over the last bead to hold all the beads in place and to keep them from falling off.
3. Add beads till you reach the end
Continue adding beads to the fuzzy stick until you nearly reach the end. As you can see in the first picture below, I left a small space between my last two beads on the fuzzy stick. You will want to do the same so you have a space to add the wings on. After your last bead, twist the end of the fuzzy stick a couple times and fold it over the last bead to secure it in place.
4. Make the big wing
To get the wings ready, take your shimmer stick, cut about 2″ off and fold it in half. Twist the ends together to join them in a circle and then pinch down the center of the circle to form oval shaped wings. Twist the shimmer stick once in the center for it to keep it’s wings shape.
5. Attach wings to the stick
Place the wing in the opening you left on the blue fuzzy stick. Twist the wings around the blue fuzzy stick once to secure it in place.
7. Finish with eyes
Finish your dragonfly by securing 2 tiny wiggly eyes onto the top pony bead with 2 glue dots. You could use a drop of hot glue if you don’t have glue dots.
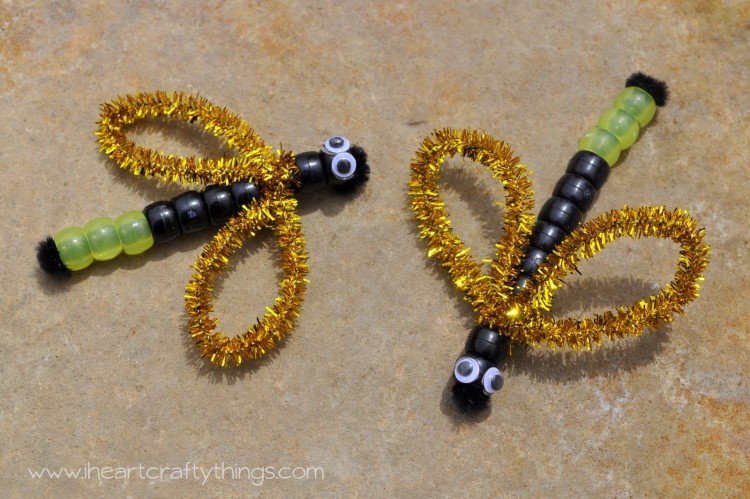
We had a big discussion about what color to use for the wings for the Lightning Bugs. You may decide you want something different. My kids unanimously loved the idea of having gold wings that matched their glowing bottom and I thought it was fitting.
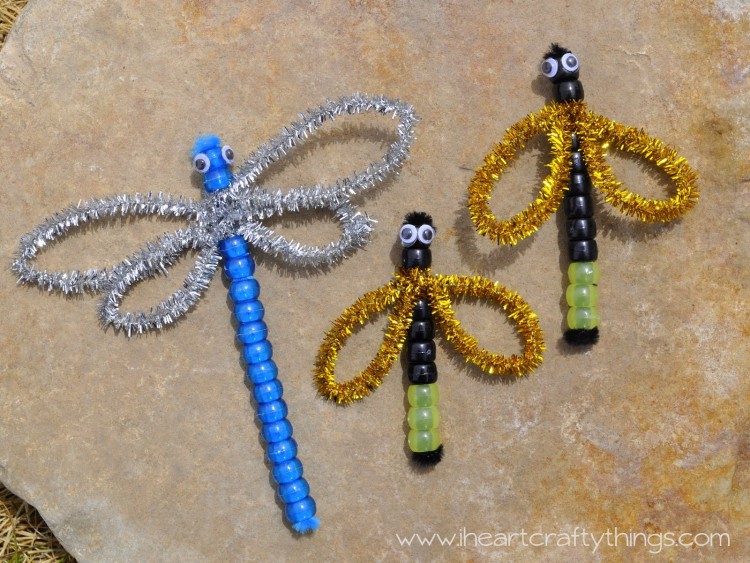
My kids have been in heaven with these little insects! I really hope you enjoy them as much as we have!
