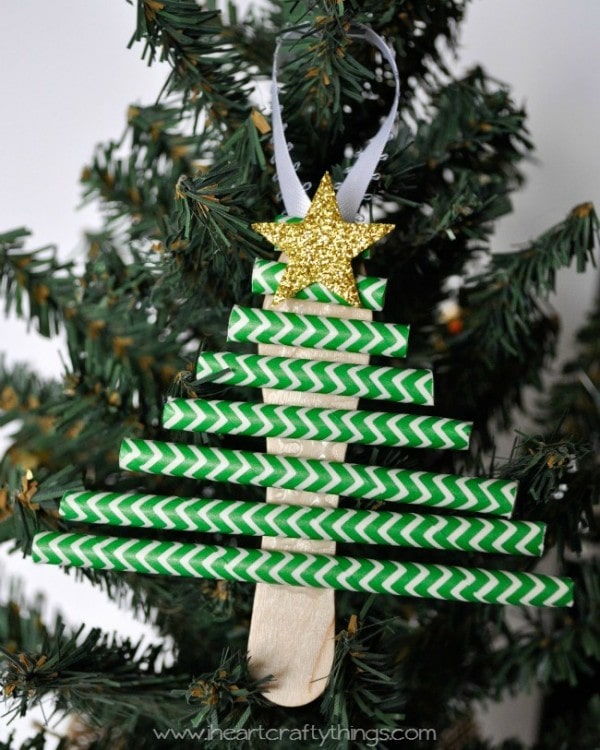
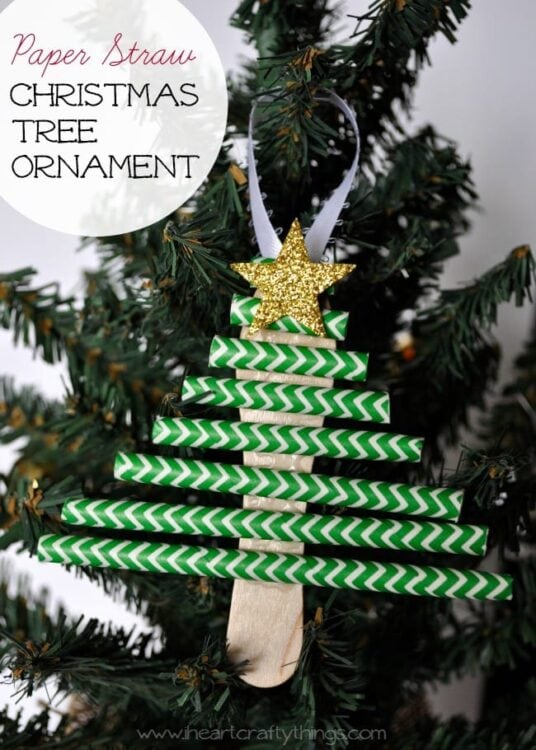
Kids Christmas Tree Ornament

I am thrilled to be participating in a collaborative 10-Days of a Kid-Made Christmas series this month with 70+ kid bloggers. We are each sharing a kid-made ornament that accompanies a related children’s book.  I am sharing this Paper Straw Christmas Tree Ornament that goes along with one of our favorite Christmas books, Mr. Willowby’s Christmas Tree by Robert Barry.

{This post contains affiliate links for your convenience. Read our Disclosure Policy for more information.}
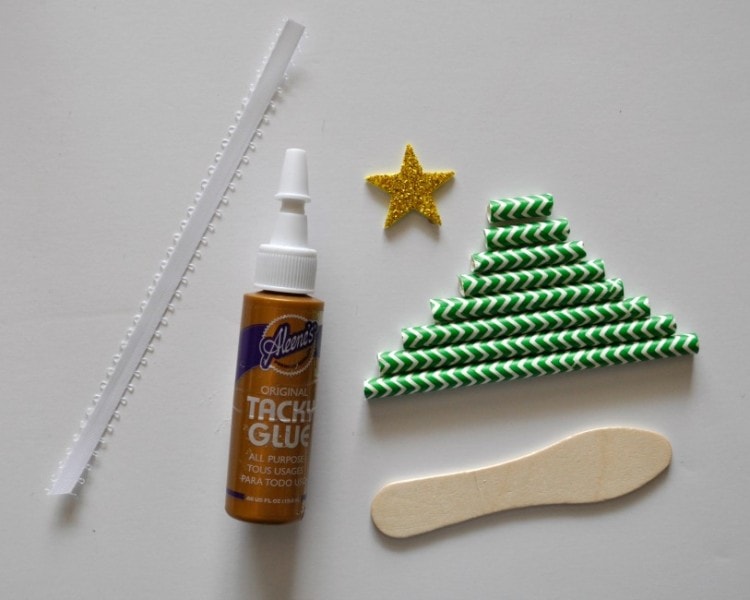
 

About the Story


Oh how I love this delightful story! Mr. Willowby
has his Christmas Tree delivered and finds it is too large for his room, so the butler cuts the top off the tree and gives it to the upstairs maid for her to use it as her Christmas tree. The tree ends up being too large for the maid so she cuts the top off as well and the gardner takes it home to use as his Christmas tree. Throughout the book you follow along as everyone keeps snipping the top off of their tree until the last little tip ends up in a mouse’s house. It makes for a great lesson on giving and recycling.


You can find Mr. Willowby’s Christmas Tree on Amazon!


Paper Straw Christmas Tree Ornament


I picked up a package of green paper straws several weeks ago and had been itching for a fun way to use them. After reading the story with my daughter I was inspired and we put together a simple and adorable Christmas Tree Ornament using paper straws.


Supplies you will need:


Directions:

1. Cut your straws in pieces of varying length from small to large. We used 9 pieces for our tree. My daughter loves to cut these straws for cutting practice so I let her cut a couple of the straws and picked out pieces to use for the smaller section and then I cut the larger pieces for her.
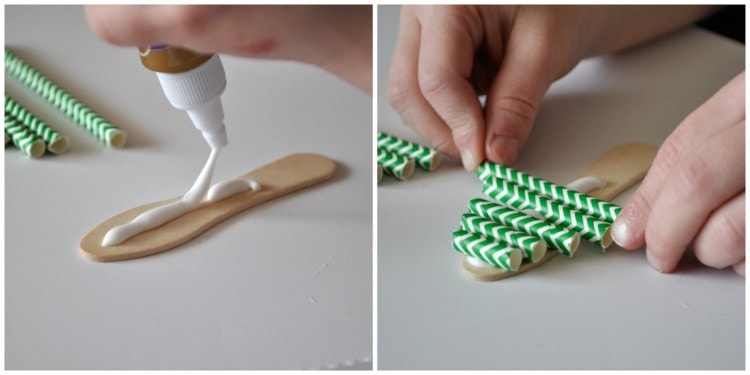
2. Lay your straw pieces out in order from small to large next to you. Add a generous amount of tacky glue onto the top 2/3 of your scoop stick (scoop end at the top). Start placing the straws onto your scoop stick, layering them from small to large.

3. Peel the backing off of your glitter foam star sticker, place a dot of tacky glue on the back of it (to make it more durable) and place it at the top of your tree. Let your tree dry completely.

4. Once your tree is dry, hot glue a ribbon loop to the back of your tree so you can hang your ornament on your tree. (I helped my daughter with this step.)


Here are the other fabulous bloggers who are sharing their ornament today. Make sure to stop by to read about their kid-made ornament and book recommendation.


Sugar Aunts

My Little 3 and Me

In the Playroom

Craft Ideas for Kids

Discovering the World Through My Son’s Eyes

Preschool Powol Packets


Don’t miss out on all the other great ideas being shared over the next week. You can find the schedule of what is coming each day on Mama Miss, together with a link-up of all the ideas that have already been shared.


{Note: While we were waiting to post our ornaments for the series, we came across a similar paper straw ornament craft at Simple as That via Pinterest and wanted to share that one with you too.}


More Christmas Craft on I Heart Crafty Things:

You can follow I Heart Crafty Things on FacebookPinterest

Google+Twitter, and Instagram!


rachel

Take Time for Yourself to Create {An Apostrophe S Craft Party}

Balloon Printed Snowman Craft